密度汎関数理論(density functional theory, DFT)に基づく第一原理計算(first-principles calculation)プログラム. GPLライセンスで配布されていて無料で使える.
インストール
参考ウェブサイト
本家サイトのインストールページ以外に,以下のサイトにお世話になった.(150723)
ダウンロードと展開
ABINITのウェブサイトから最新版もしくは安定版をダウンロードしてくる.
abinit-7.10.4.tar.gzというファイルをダウンロートしてきたとする.
$ mv abinit-7.10.4.tar.gz ~/src/
$ cd ~/src
$ tar xvzf abinit-7.10.4.tar.gz
$ cd abinit-7.10.4/
configure
build.acのようなファイルに以下のconfigure用のオプションを記述する.
FC=mpiifort
CC=mpiicc
CXX=mpiicpc
enable_mpi="yes"
enable_mpi_io="yes"
ここで,FCやCCにMPIコンパイラを指定し,enable_mpi="yes"とすることでMPIプログラムを作成するようにする.
以下のようにconfigureを実行する.
$ ./configure --with-config-file="./build.ac"
最終的に以下のような出力が表示される.
Summary of important options:

  * C compiler      : intel version 11.1
  * Fortran compiler: intel version 11.1
  * architecture    : intel xeon (64 bits)

  * debugging       : basic
  * optimizations   : standard

  * OpenMP enabled  : no (collapse: ignored)
  * MPI    enabled  : yes
  * MPI-IO enabled  : yes
  * GPU    enabled  : no (flavor: none)

  * TRIO   flavor = none
  * TIMER  flavor = abinit (libs: ignored)
  * LINALG flavor = netlib-fallback (libs: ignored)
  * ALGO   flavor = none (libs: ignored)
  * FFT    flavor = none (libs: ignored)
  * MATH   flavor = none (libs: ignored)
  * DFT    flavor = none

Configuration complete.
You may now type "make" to build ABINIT.
(or, on a SMP machine, "make mj4", or "make multi multi_nprocs=<n>")
FFTWやLINALGなど外部ライブラリを何も使っていないことが分かる. atlasやlapack,fftwなんかを利用したい場合は,それらをしっかりとインストールしてからconfigureに指定する必要がある.
make
$ make mj4
こうすることで4プロセスで並列makeが実行される. makeはほぼ完全並列が可能なので1プロセスの場合の4倍のスピードアップとなる. それでも結構時間がかかる.
test
abinitプログラムがちゃんと動作するかどうかの簡単かつ短いテストが以下のようにして行われる.
$ make test_fast
以下のようなレポートが表示される.
Suite   failed  passed  succeeded  skipped  disabled  run_etime  tot_etime
fast         0       0         11        0         0      29.98      31.87
Test suite results in HTML format are available in Test_suite/suite_report.html
これを見るとちゃんとプログラムのコンパイルができたような気になれる.
以下のようにすると多くのテストを一気にやってくれる.
$ cd tests/
$ python runtests.py
このテストはかなりの時間がかかるが,全部終わると以下のようなレポートが表示される.
Suite        failed  passed  succeeded  skipped  disabled  run_etime  tot_etime
atompaw           0       0          0        2         0       0.00       0.02
bigdft            0       0          0       22         0       0.00       0.01
built-in          0       0          3        4         0       2.06       2.06
etsf_io           0       0          0        7         0       0.00       0.00
fast              0       0         11        0         0      30.03      31.76
fox               0       0          0        2         0       0.00       0.00
gpu               0       0          0        4         0       0.00       0.00
libxc             0       0          0       21         0       0.00       0.01
mpiio             0       0          1       13         0       1.50       1.62
paral             1       7         13       69         0     491.09     495.87
seq               0       0          0       19         0       0.00       0.01
tutoparal         0       0          1        1         0       0.45       0.49
tutoplugs         0       0          0        4         0       0.00       0.00
tutorespfn        0      10         13        0         0    1082.32    1100.98
tutorial          0       9         39        0         0     957.74     967.33
unitary           0       0         17       17         0      68.63      69.19
v1                0       1         75        0         0     190.38     199.86
v2                0      10         69        0         0     265.20     277.18
v3                0      11         69        0         0     398.73     419.05
v4                1      14         47        0         0     473.98     490.43
v5                1      14         59        0         0    1042.86    1105.93
v6                0      10         50        0         0     782.34     803.12
v67mbpt           0      12          6        0         0     346.79     352.29
v7                1       9         22        0         0    1280.04    1291.87
vdwxc             0       0          0        1         0       0.00       0.00
wannier90         0       0          0        7         0       0.00       0.00
Test suite results in HTML format are available in Test_suite/suite_report.html
このレポートを見てもこれで良いのかどうか分からないが...
基本的な使い方
ABINITのウェブサイトには充実したTutorialがあるので,それに従ってひと通り勉強することをおすすめする.
VESTAで電荷密度可視化
なんらかの計算をし,ab_o_DENという電荷密度の情報が入ったバイナリファイルを作成できたとする.
cut3dコマンドを使用すると以下のようになる.
$ cut3d

.Version 7.10.4 of CUT3D
.(MPI version, prepared for a x86_64_linux_intel11.1 computer)
...

  What is the name of the 3D function (density, potential or wavef) file ?
ここで,ab_o_DENというファイル名を入力すると,
ab_o_DEN
  => Your 3D function file is : ab_o_DEN

  Does this file contain formatted 3D ASCII data (=0)
   or unformatted binary header + 3D data        (=1) ?
   or ETSF binary                                (=2) ?
となるので,1を選択し,
1
  1 => Your file contains unformatted binary header + 3D data
  The information it contains should be sufficient.
  cut3d : read file ab_o_DEN from unit number 19.

...

  What is your choice ? Type:
   0 => exit
   1 => point  (interpolation of data for a single point)
   2 => line   (interpolation of data along a line)
   3 => plane  (interpolation of data in a plane)
   4 => volume (interpolation of data in a volume)
   5 => 3D formatted data (output the bare 3D data - one column)
   6 => 3D indexed data (bare 3D data, preceeded by 3D index)
   7 => 3D Molekel formatted data
   8 => 3D data with coordinates (tecplot ASCII format)
   9 => output .xsf file for XCrysDen
  10 => output .dx file for OpenDx
  11 => compute atomic charge using the Hirshfeld method
  12 => NetCDF file
  14 => Gaussian/cube wavefunction module
のようにファイルタイプの選択を求められるので,XCrysDenタイプ(9)を選択する.
9
Your choice is 9
Enter the name of an output file:
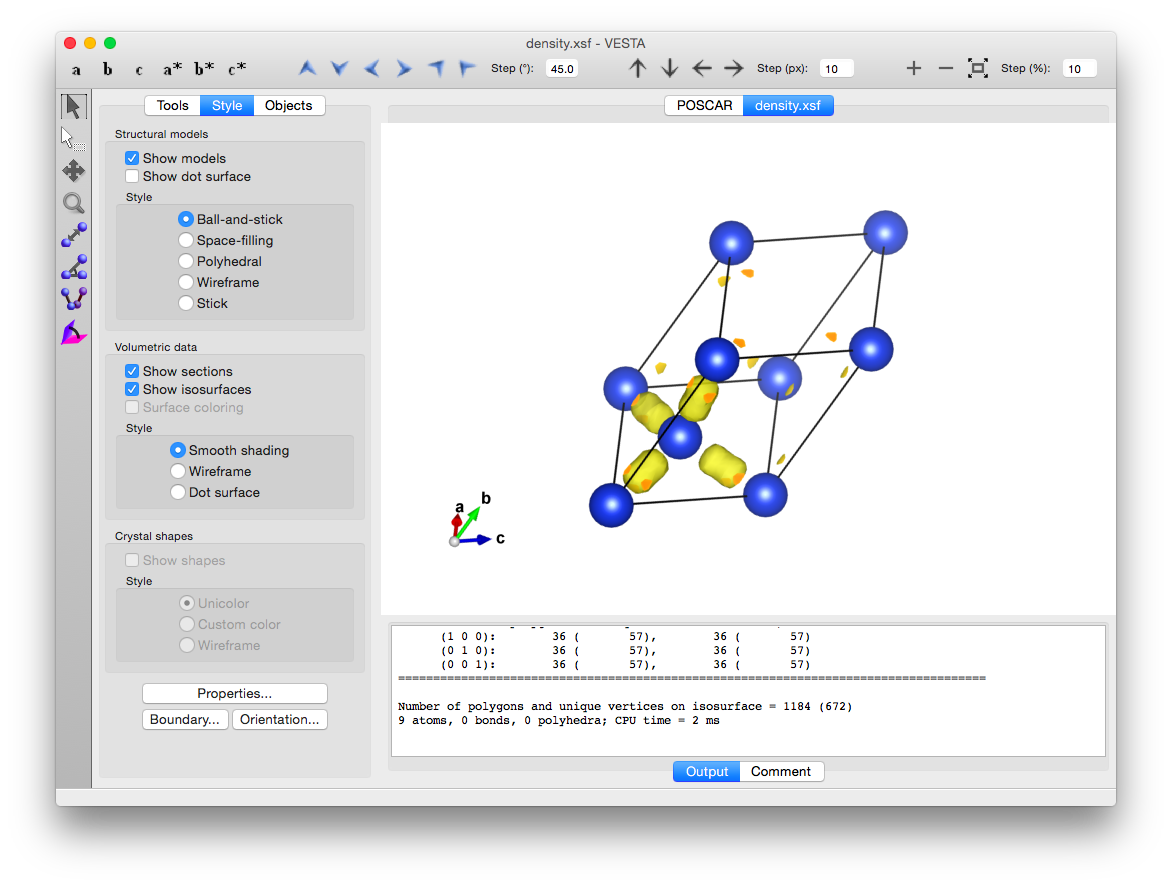
density.xsf
The name of your file is : density.xsf
そしてファイル名density.xsfを指定して出力することを求める.
あとは,これをVESTAで開くと電荷密度を可視化することができる.